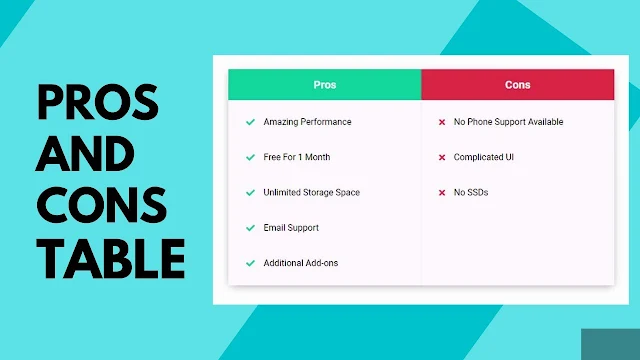
How To Add A Pros And Cons Table In Blogger?
If you want to add a pros and cons table to your Blogger site using HTML, this article will provide you with step-by-step instructions.

Learn how to add a beautiful pros and cons table to your Blogger blog.
You can create an HTML table using only HTML and CSS. This table can be used for product comparison and other purposes.
Let's learn how to use it on your Blogger website.
How To Add A Pros And Cons Table In Blogger?
Step 1 - To add the Pros and Cons table, go to your Blogger dashboard, click on "New post," and switch to HTML view.
Step 2 - Now, please copy the HTML code below, edit the table data, and paste it into your blog post.
<div class="pros-cons">
      <div class="pros-container">
        <h2 class="heading">Pros</h2>

        <ul class="pros">
          <li>Free Online Movies</li>
          <li>HD Quality</li>
          <li>MP4 Extension</li>
          <li>Best UI Features</li>
          <li>No Lag Performance</li>
        </ul>
      </div>

      <div class="cons-container">
        <h2 class="heading">Cons</h2>

        <ul class="cons">
          <li>Required High Data</li>
          <li>High Pricing</li>
          <li>Only For Buisnesses</li>
        </ul>
      </div>
</div>STEP-3: Now copy the Below CSS code and paste it below the first code.
<style>
.pros-cons {
  font-family: systemui;
  display: flex;
  max-width: 700px;
  margin: 32px auto;
  box-shadow: 0 4px 16px -4px rgba(0, 0, 0, 0.4);
}
.pros-cons .heading {
  font-size: 20px;
  text-align: center;
  color: #fff;
  margin: 0;
  padding: 16px 24px;
}
.pros-cons .pros-container .heading {
  background: #02c39a;
}
.pros-cons .cons-container .heading {
  background: #e63946;
}
.pros-cons .pros-container ul li::before {
  content: "\f00c";
  font-family: "Font Awesome 5 Free";
  font-weight: bold;
  padding-right: 16px;
  color: #02c39a;
  display: block;
}
.pros-cons .cons-container ul li::before {
  content: "\f00d";
  font-family: "Font Awesome 5 Free";
  font-weight: bold;
  padding-right: 16px;
  color: #e63946;
  display: block;
}
.pros-cons .pros-container,
.pros-cons .cons-container {
  flex: 1;
}
.pros-cons .pros {
  border-right: 1px solid #eee;
}
.pros-cons ul {
  padding: 8px 0;
  list-style: none;
  margin: 0;
}
.pros-cons ul li {
  padding: 16px 32px;
  font-size: 16px;
  line-height: 2;
  display: flex;
}
@media (max-width: 530px) {
  .pros-cons {
    flex-direction: column;
  }
  .pros-cons ul li:nth-of-type(2n) {
    background: #eee;
  }
}
</style>
After adding the pros and cons table, publish the blog post on your Blogger website.
If the font-awesome stylesheet is missing from your theme, you can add the code below to the theme editor or post editor, just below the <head> tag.
<link rel="stylesheet" href="https://cdnjs.cloudflare.com/ajax/libs/font-awesome/5.15.1/css/all.min.css" integrity="sha512-+4zCK9k+qNFUR5X+cKL9EIR+ZOhtIloNl9GIKS57V1MyNsYpYcUrUeQc9vNfzsWfV28IaLL3i96P9sdNyeRssA==" crossorigin="anonymous"/>Note: To add this table to multiple blog posts, paste the CSS code directly in the theme editor instead of each blog post.
You can modify the font awesome icon in the pros and cons table by changing the CSS code. This requires changing the Unicode of font-awesome icons. The code file provided below contains the necessary codes.
If you have any questions or concerns about this pros and cons table in Blogger, please don't hesitate to ask me in the comment section.
Post a Comment